Guide for I2C OLED Display with Arduino Random Nerd Tutorials

Arduino OLED 128x64 Display from eBay China The Nerdy Talk
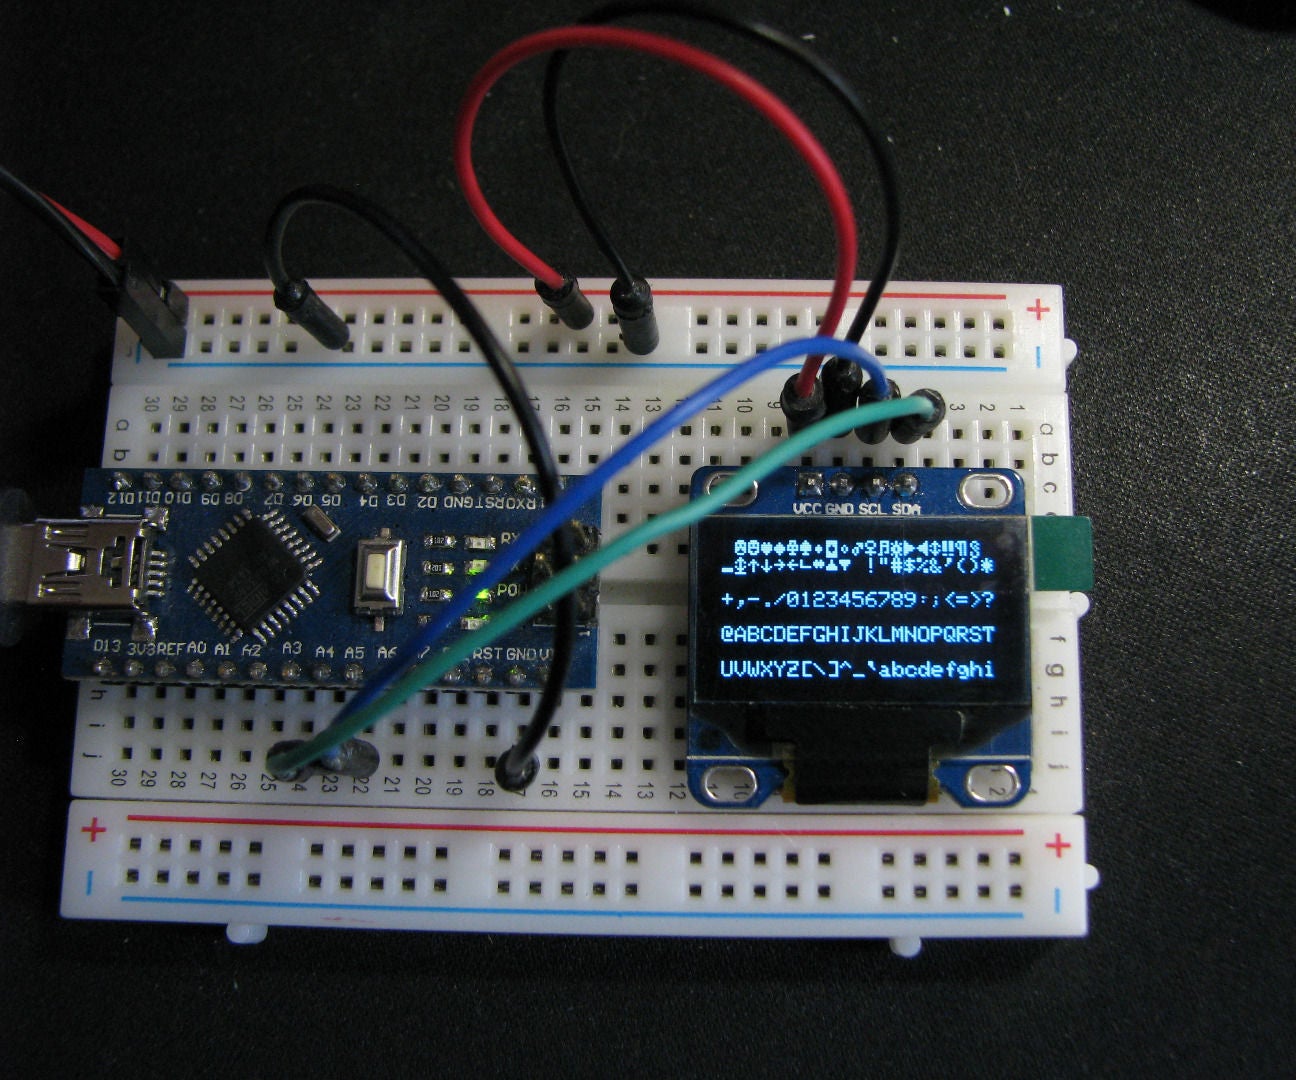
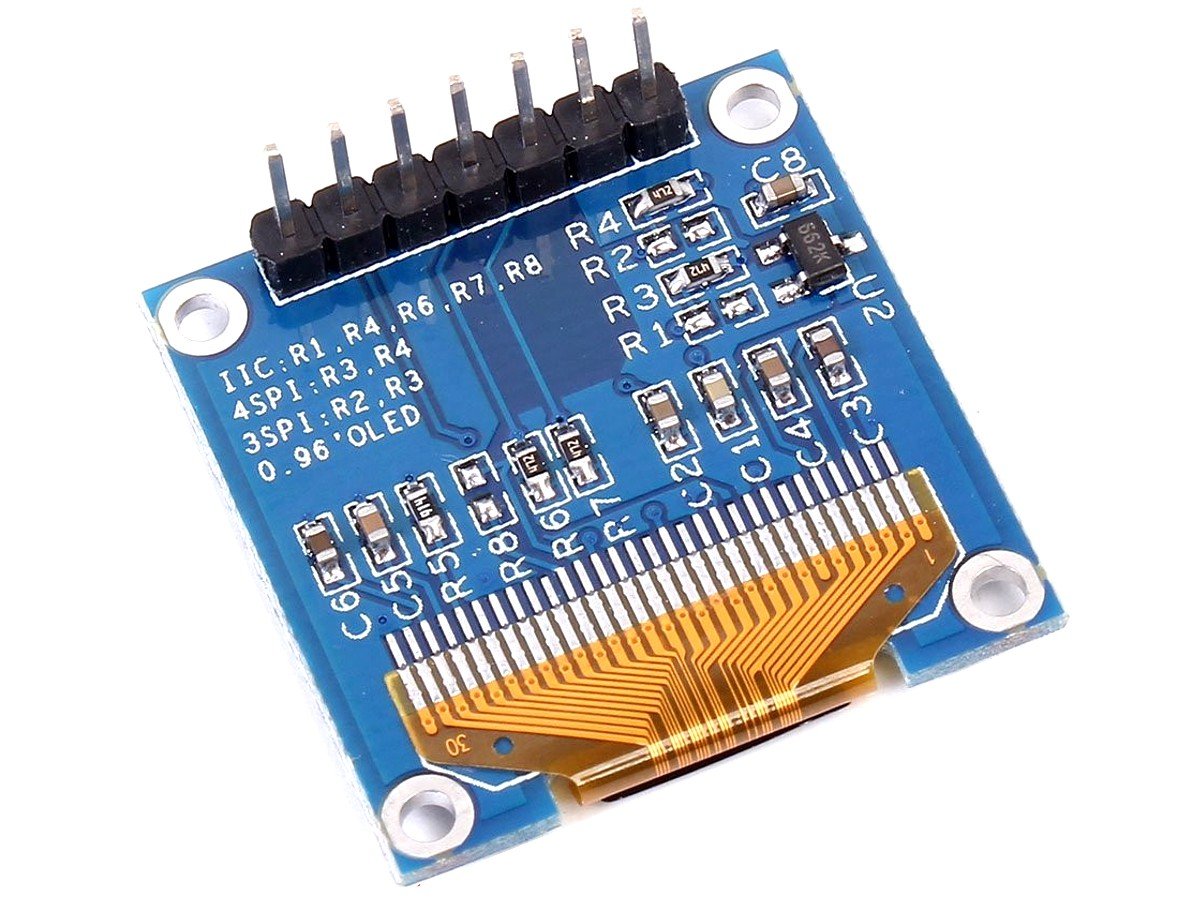
OLED Display: There are different types of OLED displays. The one I have used is 1.3″ I2C module. It has a resolution of 128 x 64 and works with the SH1106 Driver. Proper driver for the display: I used the SH1106 driver, so I installed the Adafruit_SH1106 library for that. Make sure you check what driver your display needs.

Arduino OLED 128x64 Display from eBay China The Nerdy Talk
OLED (Organic Light-Emitting Diode) displays have gained immense popularity in the electronics hobbyist community due to their vibrant colors, high contrast ratios, and low power consumption. In this article, we'll delve into the fascinating world of OLED displays, focusing on the .95-inch variant and how you can interface it with an Arduino. Understanding OLED Displays

Guide for I2C OLED Display with Arduino Random Nerd Tutorials
1. Open your Arduino IDE and go to Sketch > Include Library > Manage Libraries. The Library Manager should open. 2. Type " SSD1306 " in the search box and install the SSD1306 library from Adafruit. 3. After installing the SSD1306 library from Adafruit, type " GFX " in the search box and install the library. 4.
Arduino lesson I2C OLED Display «
Learn how to display time on OLED using Arduino, DS3231 or DS1307 RTC module. How to make an OLED clock. The detail instruction, code, wiring diagram, video tutorial, line-by-line code explanation are provided to help you quickly get started with Arduino. Find this and other Arduino tutorials on ArduinoGetStarted.com.
OLED I2c Display With Arduino 4 Steps Instructables
In this Tutorial, you are going to learn about Arduino OLED interfacing. In the first part, we will show the temperature and humidity sensor data on the OLED and in the second part, we will display the iPhone, Samsung and LG logo's on the OLED. OLED. OLED stands for Organic Light Emitting Diode. The OLED displays are very small and have high.

OLED display module, Noritake OLED module + Arduino UNO Diy tech, Arduino, Diy electronics
Software Apps. Interfacing 1.3 INCH OLED Display Module with Arduino. Step 1: Setting Up the Circuit. Step 2: Installing the Required Libraries. Step 3: Uploading the Code. Discover the power of the 1.3 inch OLED display module and its seamless integration with Arduino. With its impressive features and cutting-edge technology, this display.

MicroView Tiny Arduino with OLED Screen Onchip Display
3 Connecting OLEDs to the Arduino - I2C. 3.1 I2C OLED Displays; 3.2 Arduino with I2C OLED Hookup; 4 Adafruit Library for OLED displays. 4.1 Obtaining the Adafruit Libraries; 4.2 Demo Sketches; 5 Using the Waveshare OLED Display - SPI. 5.1 Arduino Hookup; 5.2 Demo Sketch; 6 OLED Temp & Humidity Meter. 6.1 AM2320 I2C Temperature & Humidity.
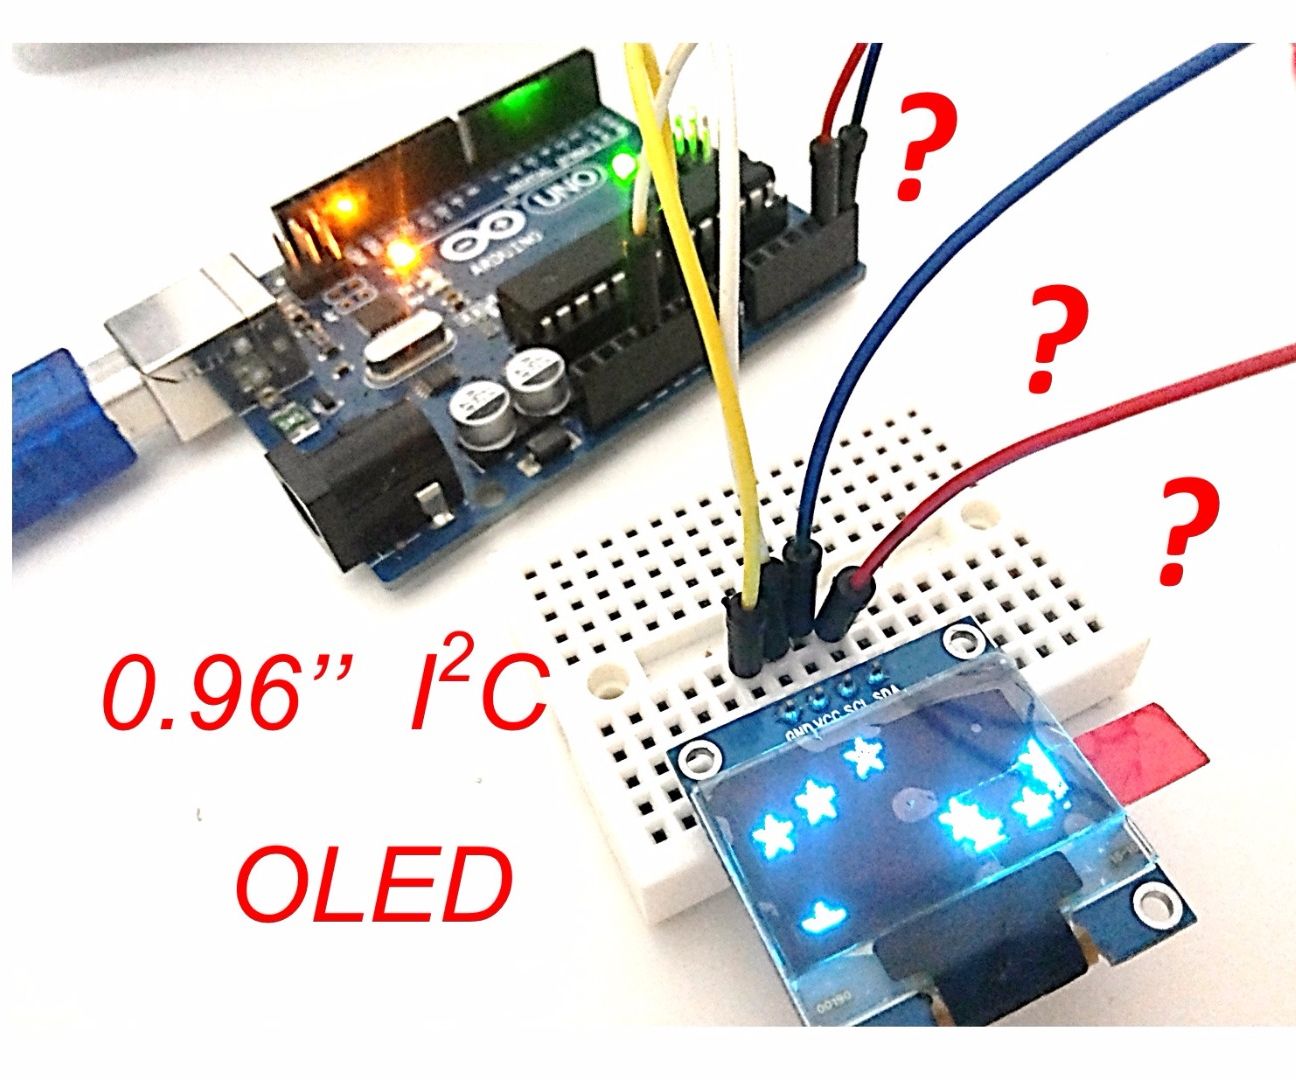
The First Usage of 0.96" I2C OLED Display With Arduino UNO 7 Steps Instructables
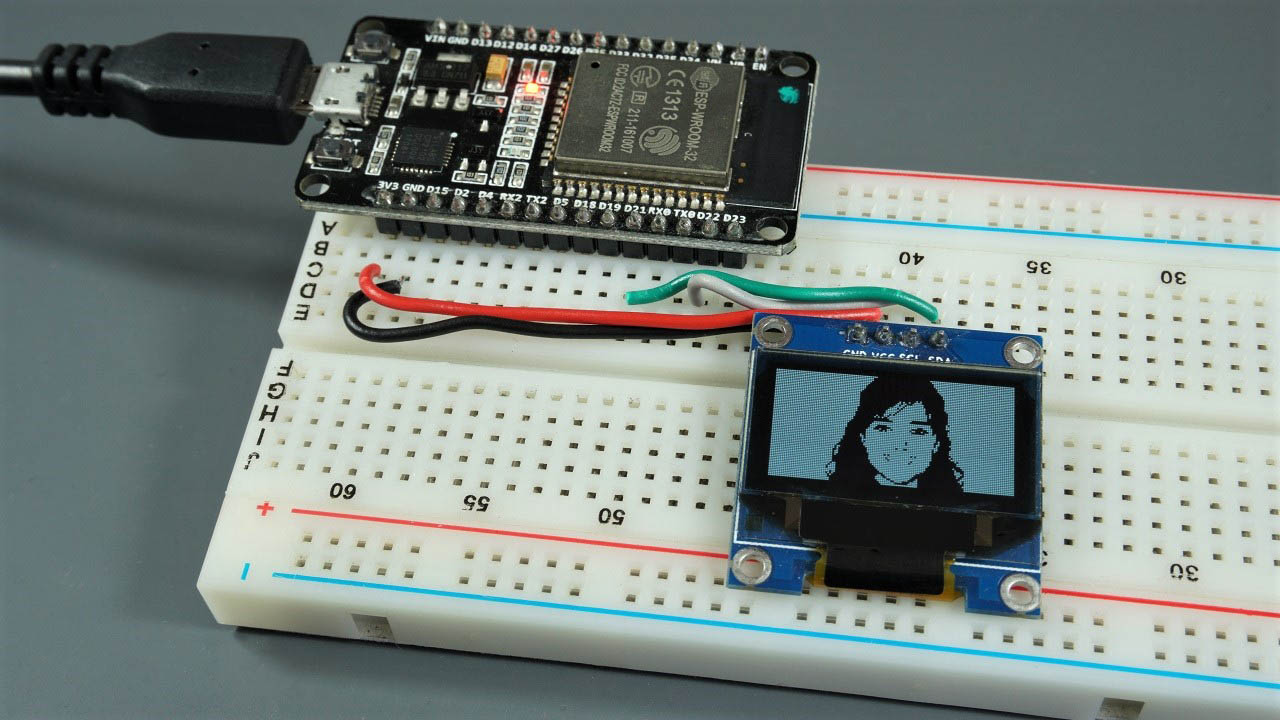
Arduino Code - Display Image. Arduino OLED Display Tutorial. To draw image on OLED, we have to convert the image (any format) to the bitmap array first. The conversion can be done by using this online tool. Please see how to convert image to bitmap array on the below image. I converted the Arduino icon to bitmap array.

Arduino OLED Display Tutorial and Library
To display text or image on an OLED display, you should first write your data to a buffer, and then show the buffer on the OLED. You can use these commands: SSD1306_begin () : Initialize the OLED Display. SSD1306_clear (…) : Clean the Display. SSD1306_string (x position, y position,…. ) : Add a text to buffer.

Pixelduino Arduino OLED Display (video)
Looking For Arduino Oled Display? We Have Almost Everything On eBay. Fast and Free Shipping On Many Items You Love On eBay.
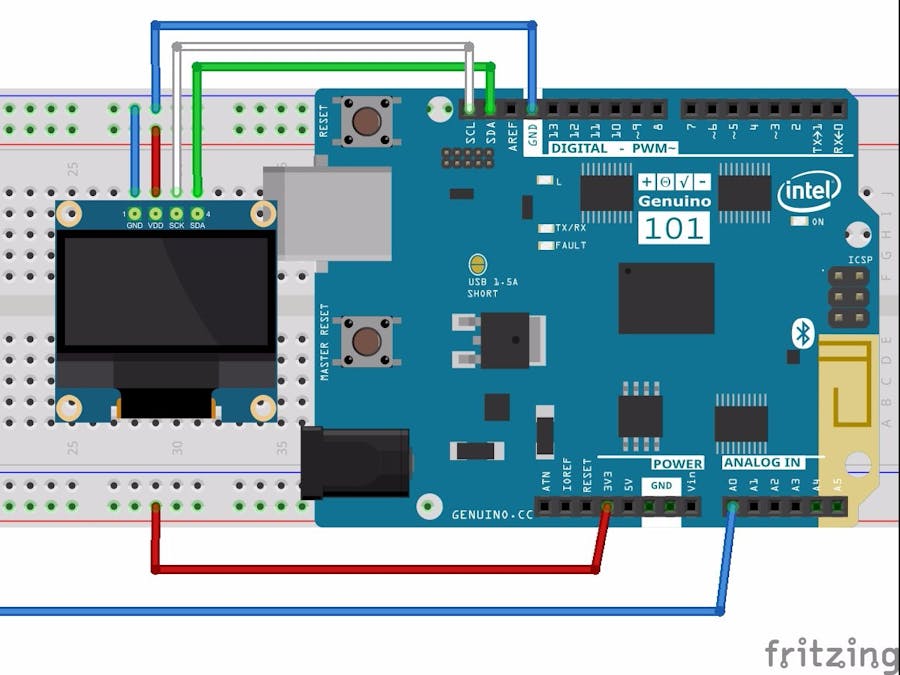
Oled Display with Arduino 101 Arduino Project Hub
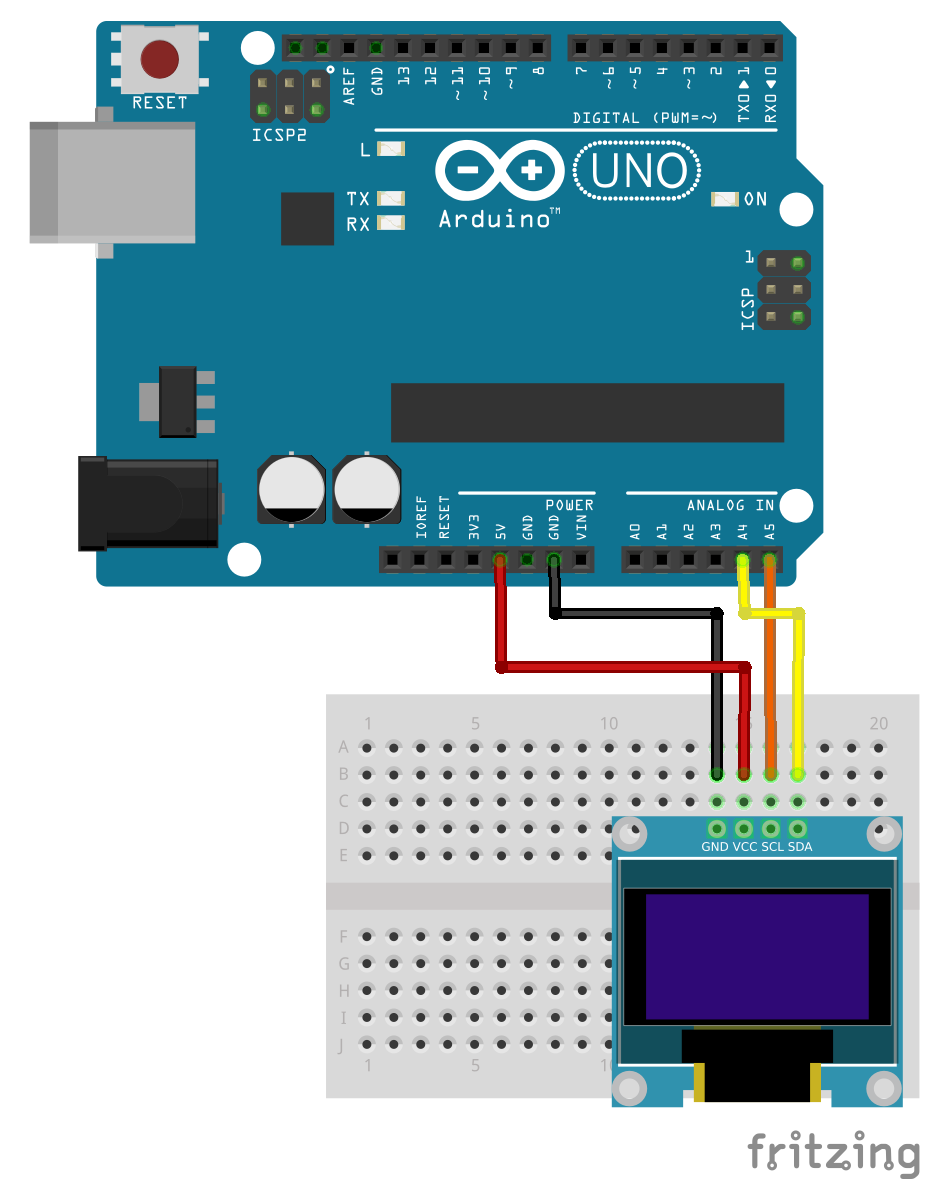
An I2C OLED display has 4 pins VSS, Ground, SCL, and SDA. The display needs 3.3v to 5v to operate. So connect the VSS pin to the Arduino 5v pin and ground to the Arduino ground. If you are using a different Arduino board, check the correct SCL and SDA pin for that board. Arduino UNO : SCL > A5, SDA > A4.
ESP32 OLED Display with Arduino IDE Random Nerd Tutorials
to check if everything works as expected, lets run an example file to test the display. steps. go FILE > EXAMPLES > SSD 1306 > Select 128 X 64 i2c. if you get and Error, try SSD 1306 > Select 128 X 32 i2c. change the I2C Address on line 61 and replace it with the address you found in step 4. upload the code.

OLED Display 0.96 inch 128x64 with SPI interface Arduino Library 35V
OLED (Organic Light Emitting Diode) displays have a lot of advantages over LCD and traditional LED displays. Today we will learn how to use OLED displays wit.
OLED Display 0.96 inch 128x64 with SPI interface Arduino Library 35V
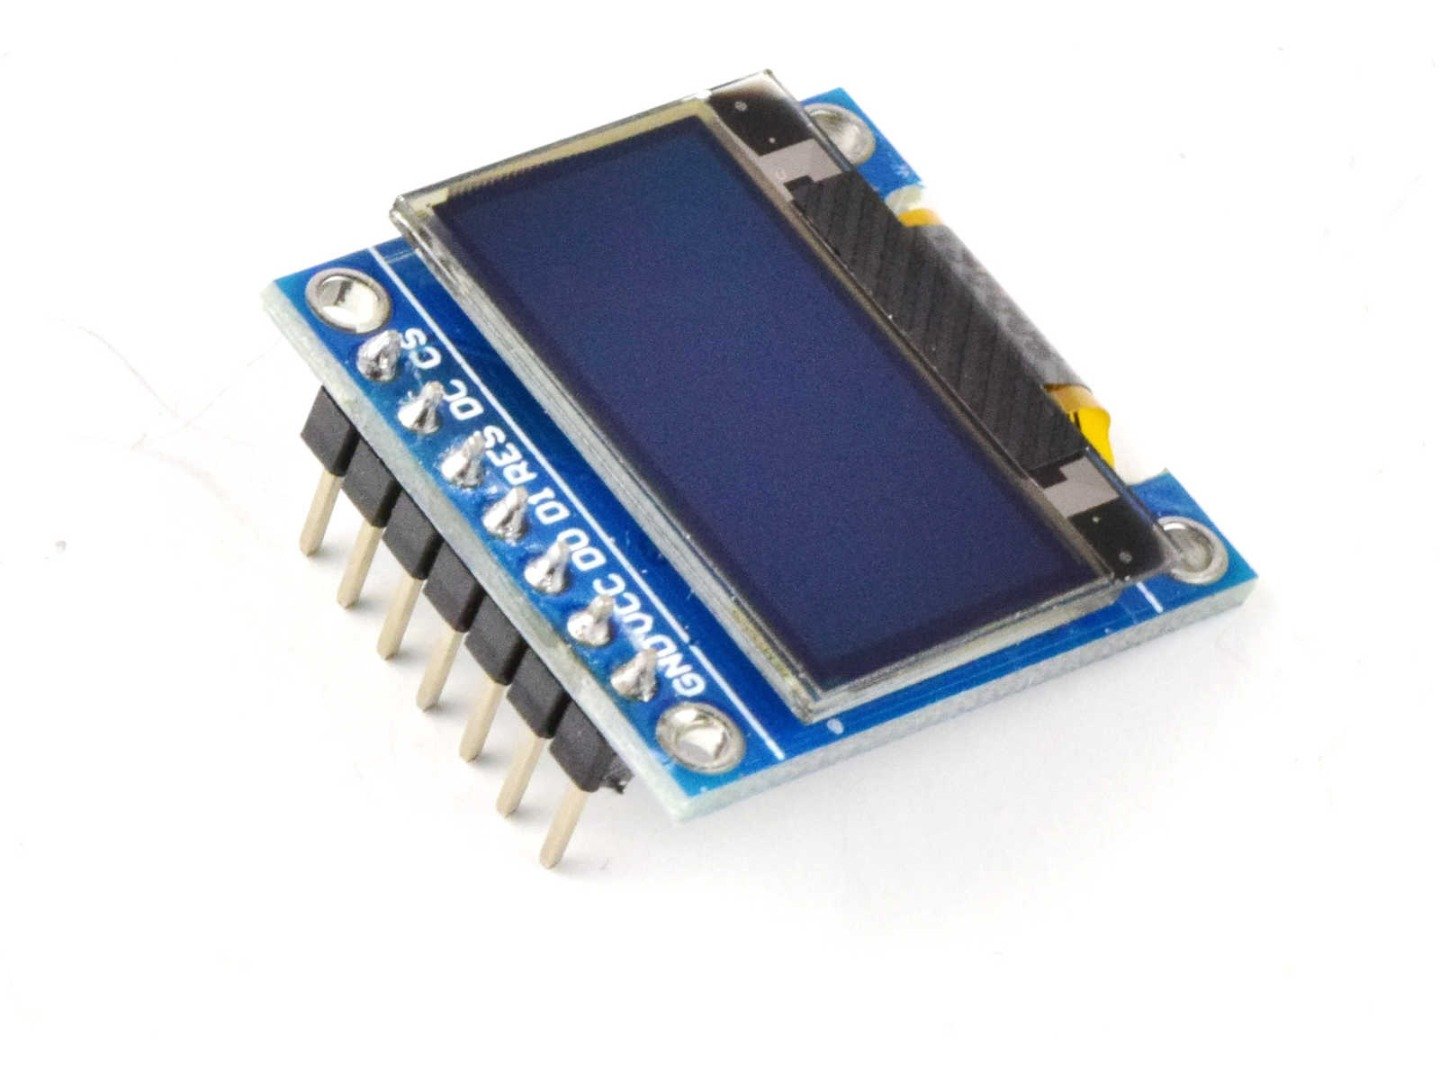
Recommended Reading: Monochrome 0.96" OLED Display SSD1306 OLED Pinout. There are four pins in this display. Imprinted as VCC, GND, SCL, and SDA respectively. The VCC and GND pins will power the OLED display and will be connected with the Arduino power supply pins as they require a driving voltage of 3.3-5V.
OLED Display 0.96 inch 128x64 with SPI interface 35V (100 compatible with Arduino)
Check that the OLED display is properly wired to the Arduino. Double-check the OLED display I2C address: with the OLED connected to the Arduino, upload this code and check the I2C address in the Serial Monitor. You should change the OLED address in the following line, if necessary. In our case, the address is 0x3C.

Setting up an OLED Screen with Arduino and SPI by Alice Wang Medium
I2C OLED Display Wiring. If you're using an I2C OLED display, please refer to this wiring. Connections are straightforward. Begin by connecting the VCC pin to the Arduino's 5V output and the GND pin to ground. Connect the SCL pin to the I2C clock pin and the SDA pin to the I2C data pin on your Arduino.
